
Understanding Vapor Barrier Installation
What is a Vapor Barrier?
A vapor barrier is a material used to resist the passage of moisture through walls, ceilings, and floors. Its primary role is to control humidity and prevent moisture buildup, which can lead to rot, mold, and structural damage. Commonly found in crawl spaces and basements, vapor barriers are essential in maintaining a healthy indoor environment, especially in areas prone to moisture.
Importance of Vapor Barrier Installation
The installation of a vapor barrier is crucial for several reasons. Firstly, it protects the structural integrity of your home by preventing moisture from seeping into wood, insulation, and other materials that are susceptible to water damage. Secondly, a vapor barrier helps improve indoor air quality by reducing humidity levels, thereby minimizing the risk of mold and mildew growth. Additionally, it can enhance energy efficiency, as maintaining a controlled environment can reduce heating and cooling costs. For comprehensive guidance on this process, check out our resources on Vapor Barrier Installation.
Common Materials Used
Several materials are commonly used for vapor barrier installation. The most popular choice is polyethylene plastic sheeting, which is available in various thicknesses, typically ranging from 6 to 20 mils. The thickness determines the material’s durability and effectiveness. Other materials may include foil-faced insulation and specialized vapor-retarding membranes, which offer additional insulation properties. Selecting the right material depends on the specific conditions of your crawl space and climate.
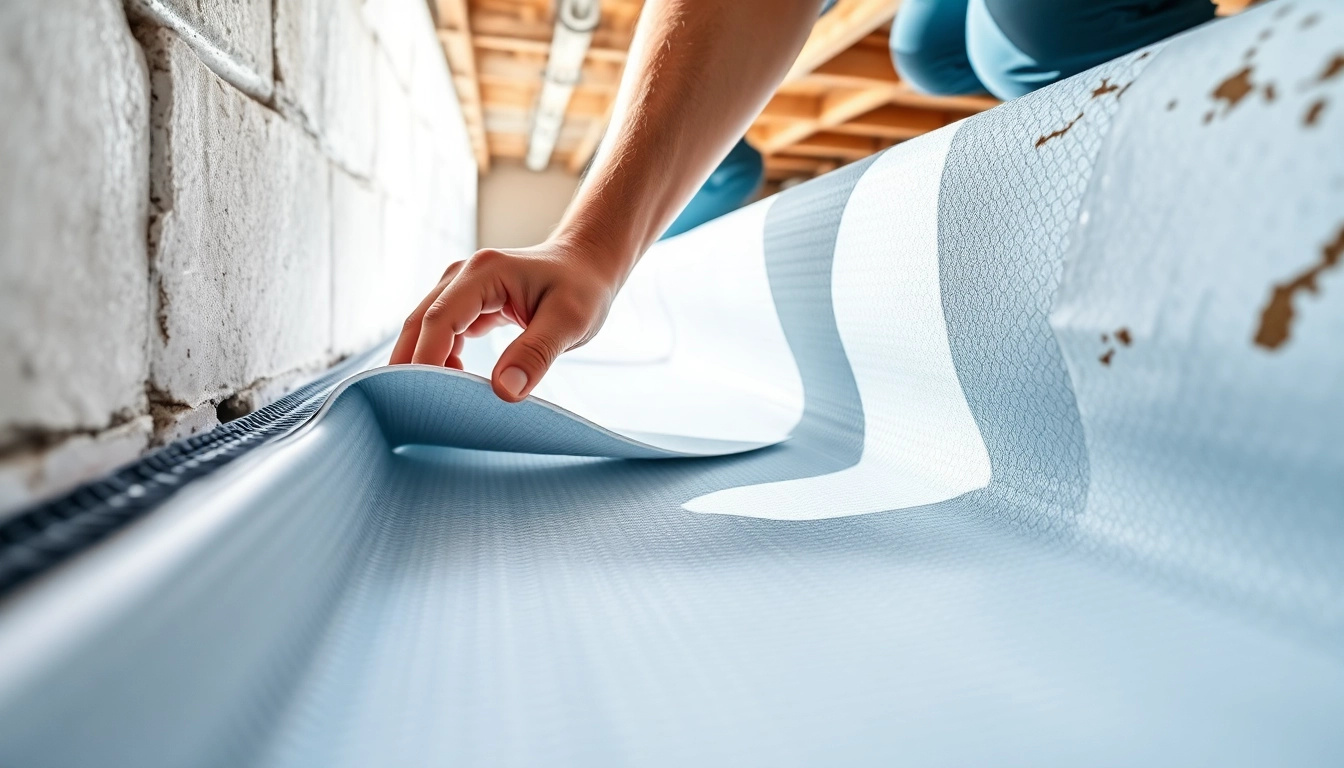
Step-by-Step Guide to Vapor Barrier Installation
Preparation of the Crawl Space
Before installing a vapor barrier, it’s essential to prepare the crawl space adequately. Start by clearing any debris, old insulation, or items that may obstruct the installation. Inspect the space for any signs of existing moisture or leaks, and address these issues before proceeding. If necessary, use a dehumidifier to dry the area. Additionally, check for any holes or cracks in the foundation that may allow moisture to enter, and seal them with a suitable waterproofing material.
Measuring and Cutting the Vapor Barrier
Once the crawl space is clean and dry, measure the dimensions of the area where the vapor barrier will be installed. It’s crucial to allow for overlaps—typically 12 inches—at seams and edges to ensure a continuous barrier. Use a sharp utility knife or scissors to cut the polyethylene sheeting to size. If your crawl space has numerous obstacles (like piers), consider cutting the sheeting into manageable sections for easier handling.
Securing the Installation
With the vapor barrier cut to size, it’s time to secure it in place. Begin by laying the sheet across the ground, ensuring that it extends to the walls and any piers. Use construction adhesive or compatible tape to secure the seams and edges to the floor and walls. If the crawl space is susceptible to pests, consider using a heavy-duty version of the vapor barrier. For added security, you may also use landscape staples to fasten the barrier to the ground. Ensure there are no gaps, as even minor openings can compromise the barrier’s effectiveness.
Common Challenges in Vapor Barrier Installation
Moisture Issues
One of the most significant challenges when installing a vapor barrier is addressing existing moisture issues. If moisture continues to seep into the crawl space, the barrier may become ineffective over time. To combat this, ensure proper grading around the foundation to direct water away from the home, and consider installing a sump pump if water intrusion is frequent. Regular inspections can help identify persistent moisture problems that need to be addressed.
Temperature Control
Temperature fluctuations in the crawl space can complicate the vapor barrier installation. Extreme cold may lead to condensation on the barrier, while extreme heat can affect its integrity. To mitigate this issue, ensure that your home’s insulation is adequate, as this helps regulate temperature and minimize any condensation buildup. Additionally, maintaining proper ventilation in the crawl space can further assist in controlling temperature and humidity levels.
Pests and Critters
Crawl spaces can attract various pests, such as rodents and insects, which can damage the vapor barrier or cause other issues. It’s crucial to seal any entry points and employ pest control measures before installation. Using thicker materials can also deter pests, and regular inspections can help keep the environment safe. Consider using a pest management professional if infestations are a severe concern in your area.
Best Practices for Maintaining Your Vapor Barrier
Regular Inspections
Once the vapor barrier is installed, regular inspections are essential to ensure its continued effectiveness. Schedule inspections at least once a year or after significant weather events, such as heavy rain or flooding. Look for signs of damage, such as tears or punctures in the barrier, and check for any moisture accumulation beneath it. Early detection of problems allows for timely repairs and maintenance.
Repairing Damage
If you discover damage during an inspection, it’s vital to address it promptly. Small tears or holes can be repaired using compatible tape or patches designed for vapor barriers. For larger areas of damage, you may need to replace sections of the barrier entirely. Always ensure that the repairs maintain the barrier’s continuity to optimize performance.
Seasonal Maintenance Tips
Seasonal changes can affect the condition of your vapor barrier. In winter, check for ice buildup, which can introduce moisture as it melts. During warmer months, monitor for increased humidity levels that could compromise the barrier. Additionally, ensure that gutters and downspouts are functioning correctly throughout the year to direct water away from your foundation.
FAQs about Vapor Barrier Installation
How often should I inspect my vapor barrier?
Inspect your vapor barrier at least once a year, especially after heavy rain or flooding, to ensure it remains intact.
Can I install a vapor barrier myself?
Yes, but it’s recommended to consult professionals for best practices and potential complications during installation.
What materials are best for a vapor barrier?
Polyethylene plastic sheeting is commonly used. Thickness between 6-20 mils is ideal for durability.
Do I need a vapor barrier in all climates?
While beneficial in humid climates, some dry areas may not require a vapor barrier, depending on ground moisture.
How can I tell if my vapor barrier is working?
Check for reduced humidity in the crawl space and lack of mold or mildew, indicating effective moisture control.